Tag Archive | skirts

The Minty Ponte Matchy Patchy Skirt

I made the Minty Ponte Top a while ago, at a sewing workshop. Workshops are great, I love them, but they are usually quite tightly timed. That meant I just followed the instructions, and didn’t have the time to really think through the optimal cutting layout to maximise the use of my fabric. So I was left with essentially the side bits that are left over from cutting on a centred fold.

Buoyed by my experience with the eye-watering scrappy stripy skirt, I was determined to patch some of those bits together and make something useful out of them. My first thought was to make a matchy matchy skirt to wear with the top. But, of course! 

I started to think about planning and designing. I wanted to be sure of what I was doing so as not to leap in and waste the fabric. With a load of long thin bits, the obvious thing to do was a Panel skirt. But that felt a bit too boring.

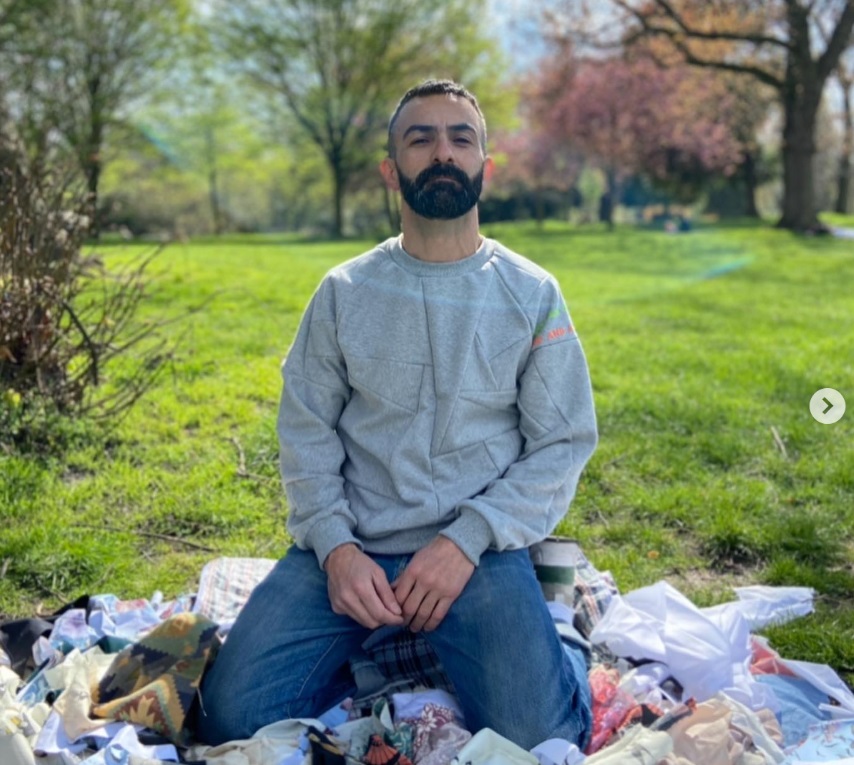
And then I saw Zoe Edwards’ fabulous scrappy sweatshirt:

To see her full post, click here

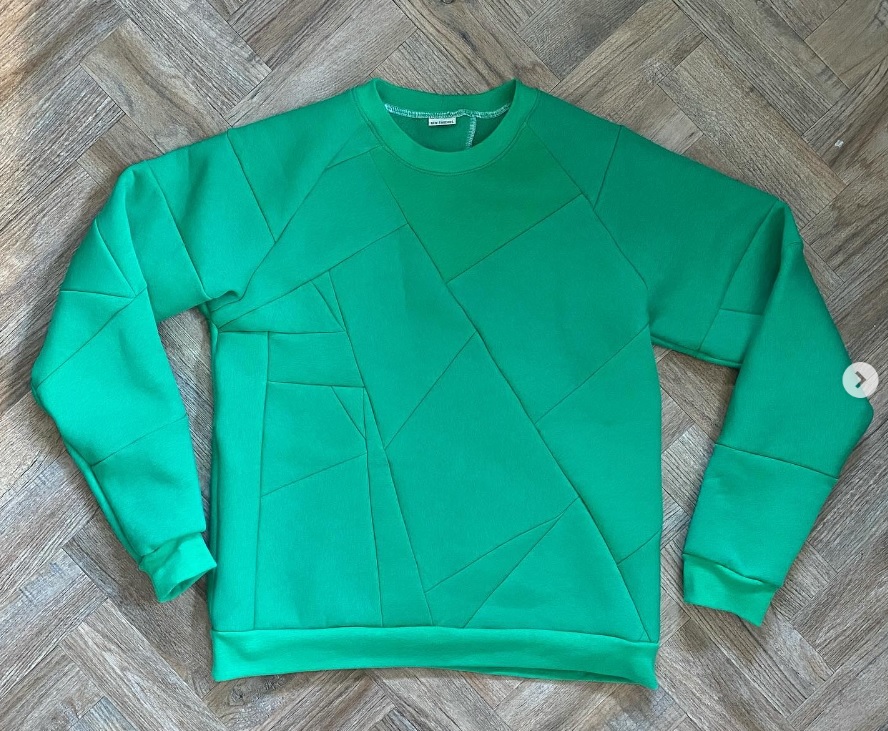
And in turn she’d been inspired by Ricardo from Sewing Bee Series 5

And his post is here

And I knew that this would be my plan for the skirt.

How it started

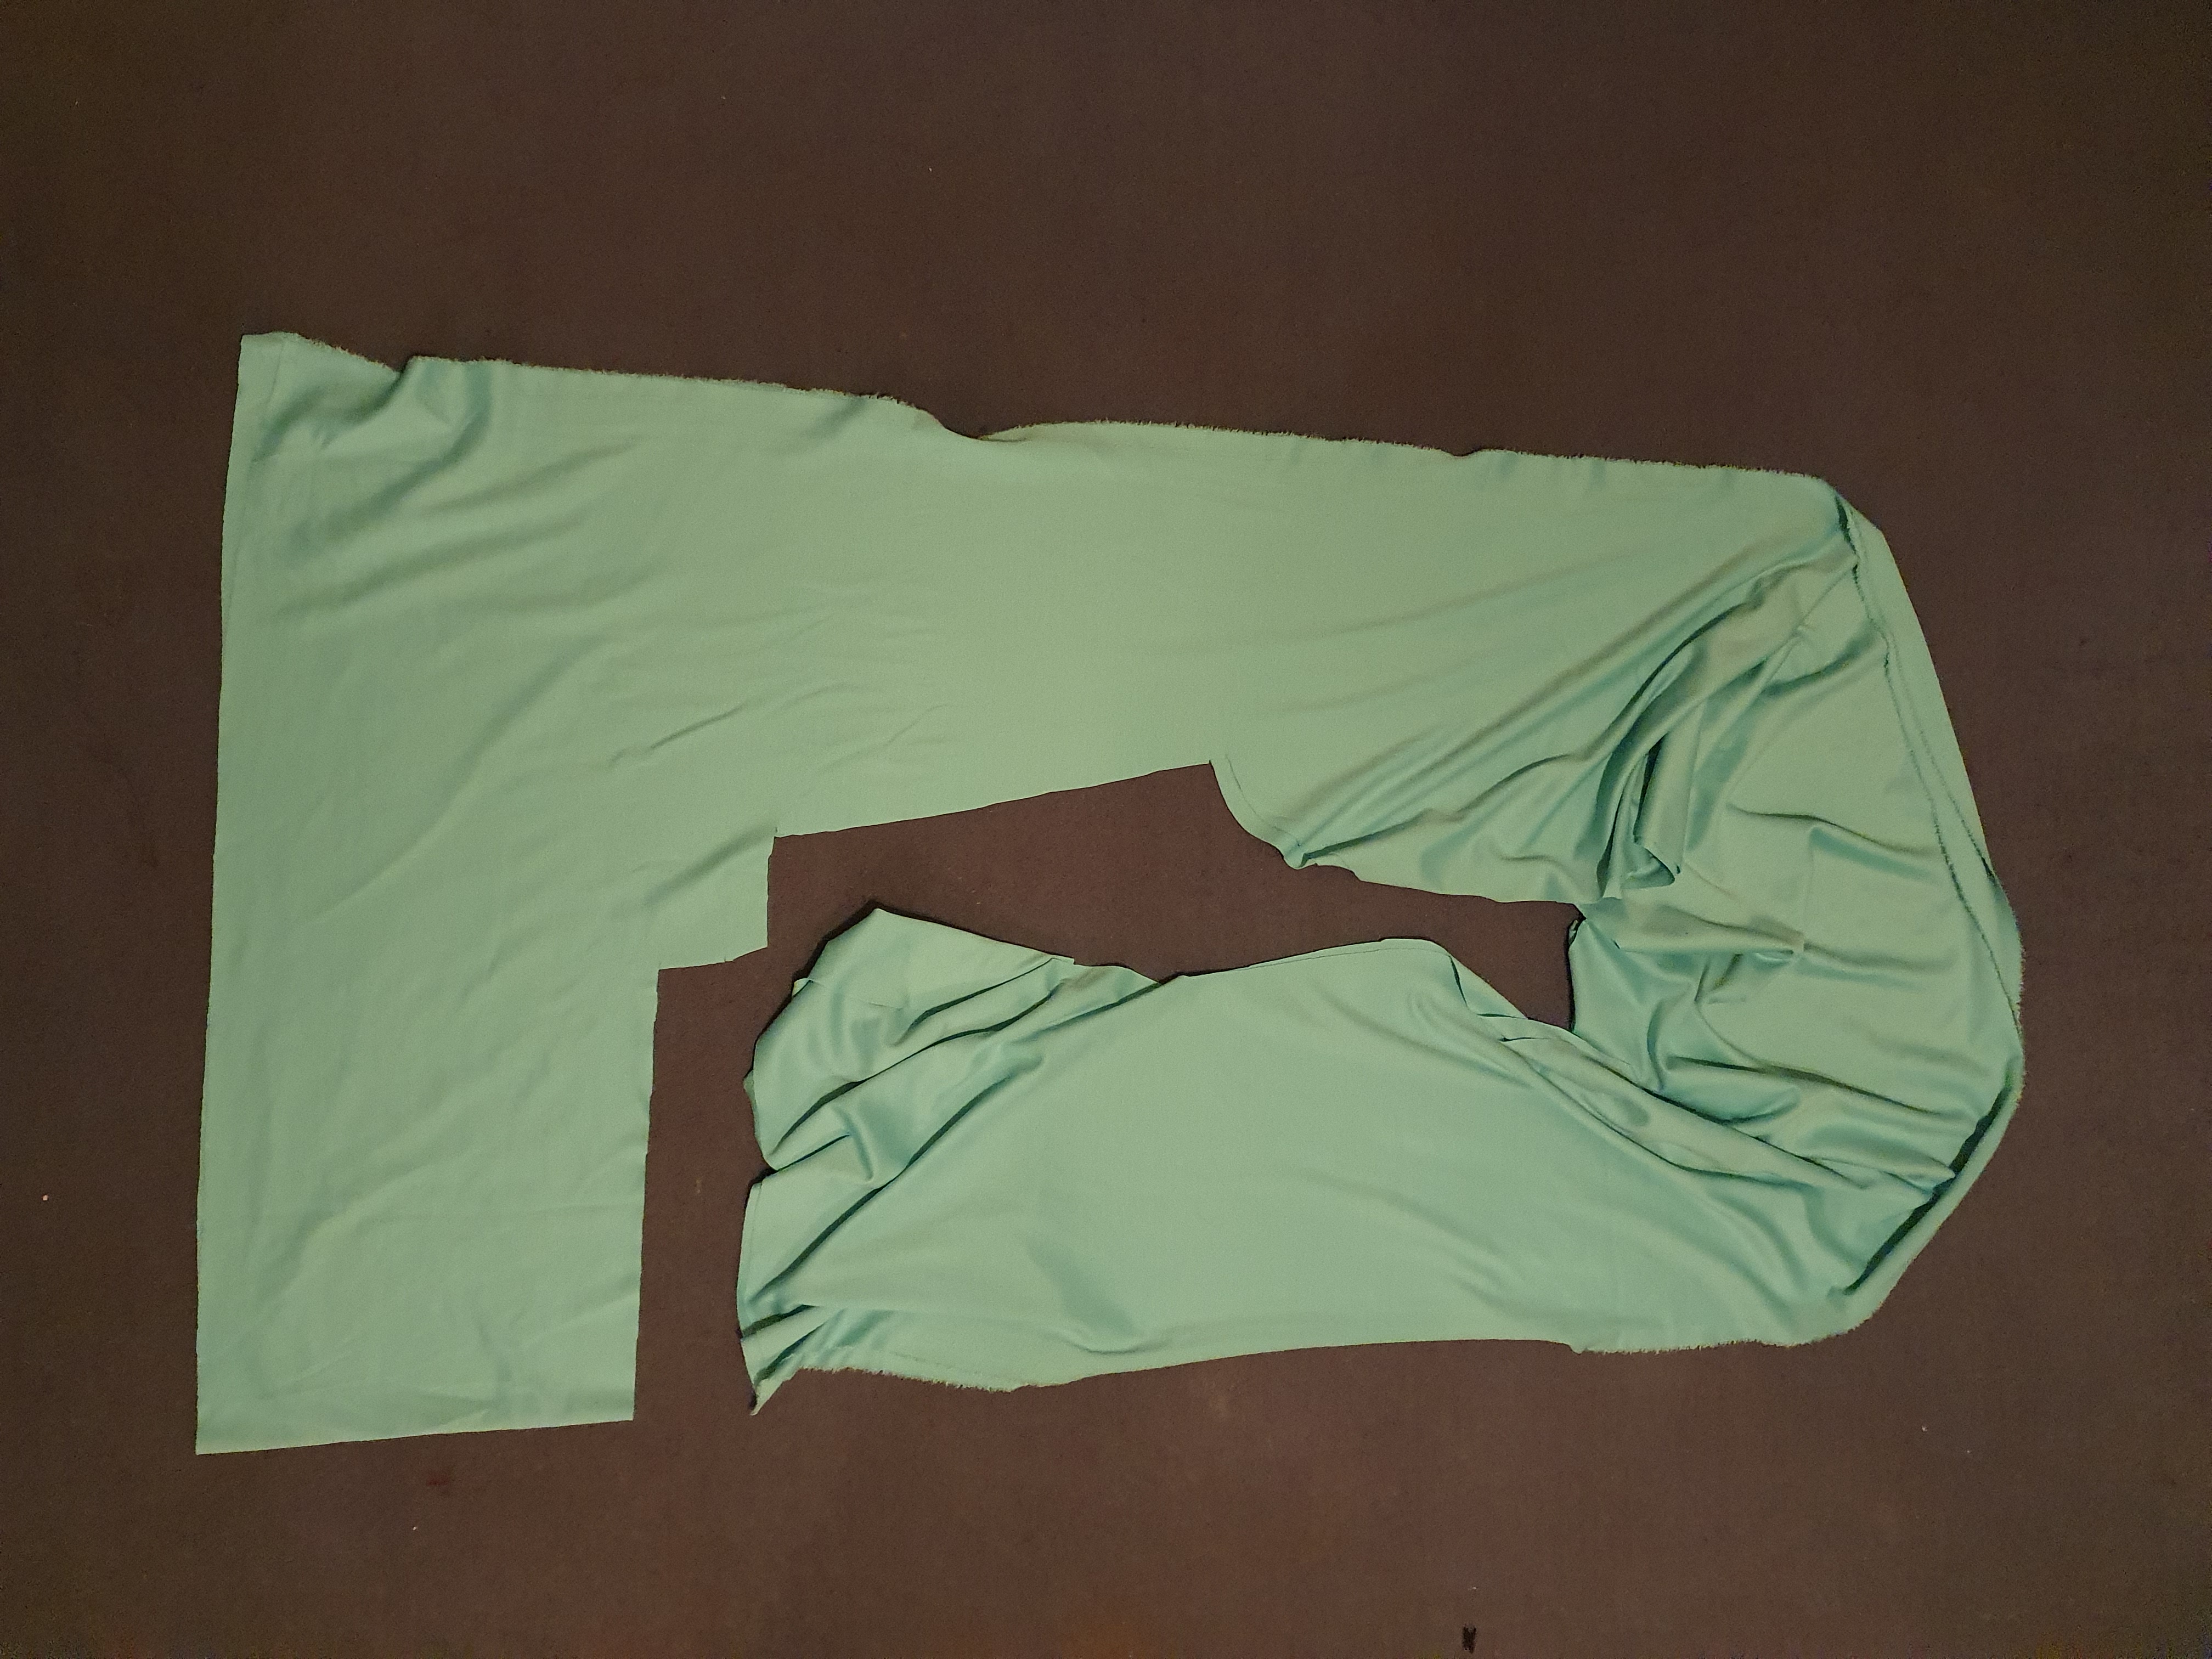
I basically had a load of long Edge Bits. There were two selvedge pieces between 30cm and 40cm wide and about 2.75m long, and they joined together at the bottom, where I hadn’t cut anything. I decided from the outset, that the full-width section would provide the casing for an elastic waistband, so that it’s all one piece and only one seam to catch on the elastic. The long thin bits were then fully available to patch together. I cut them into rectangles and triangles. I wanted to have some visual variety.

Then it was a case of sewing them all together, to create a length of fabric that I could cut two skirt pieces out of. Zoe had said on her instagram post that she didn’t worry too much about grainlines. That made the process a lot easier. I also didn’t mind too much whether I was using the good side or the wrong side of the ponte. Between those two factors I’ve got some interesting contrasts in how the light reflects off different patches of the fabric.

My main challenge was keeping the fabric that I was creating flat. I wasn’t entirely successful with that, because this is a stretch fabric. But the fact that it’s stretchy also masks that a bit.

The start of the Patching

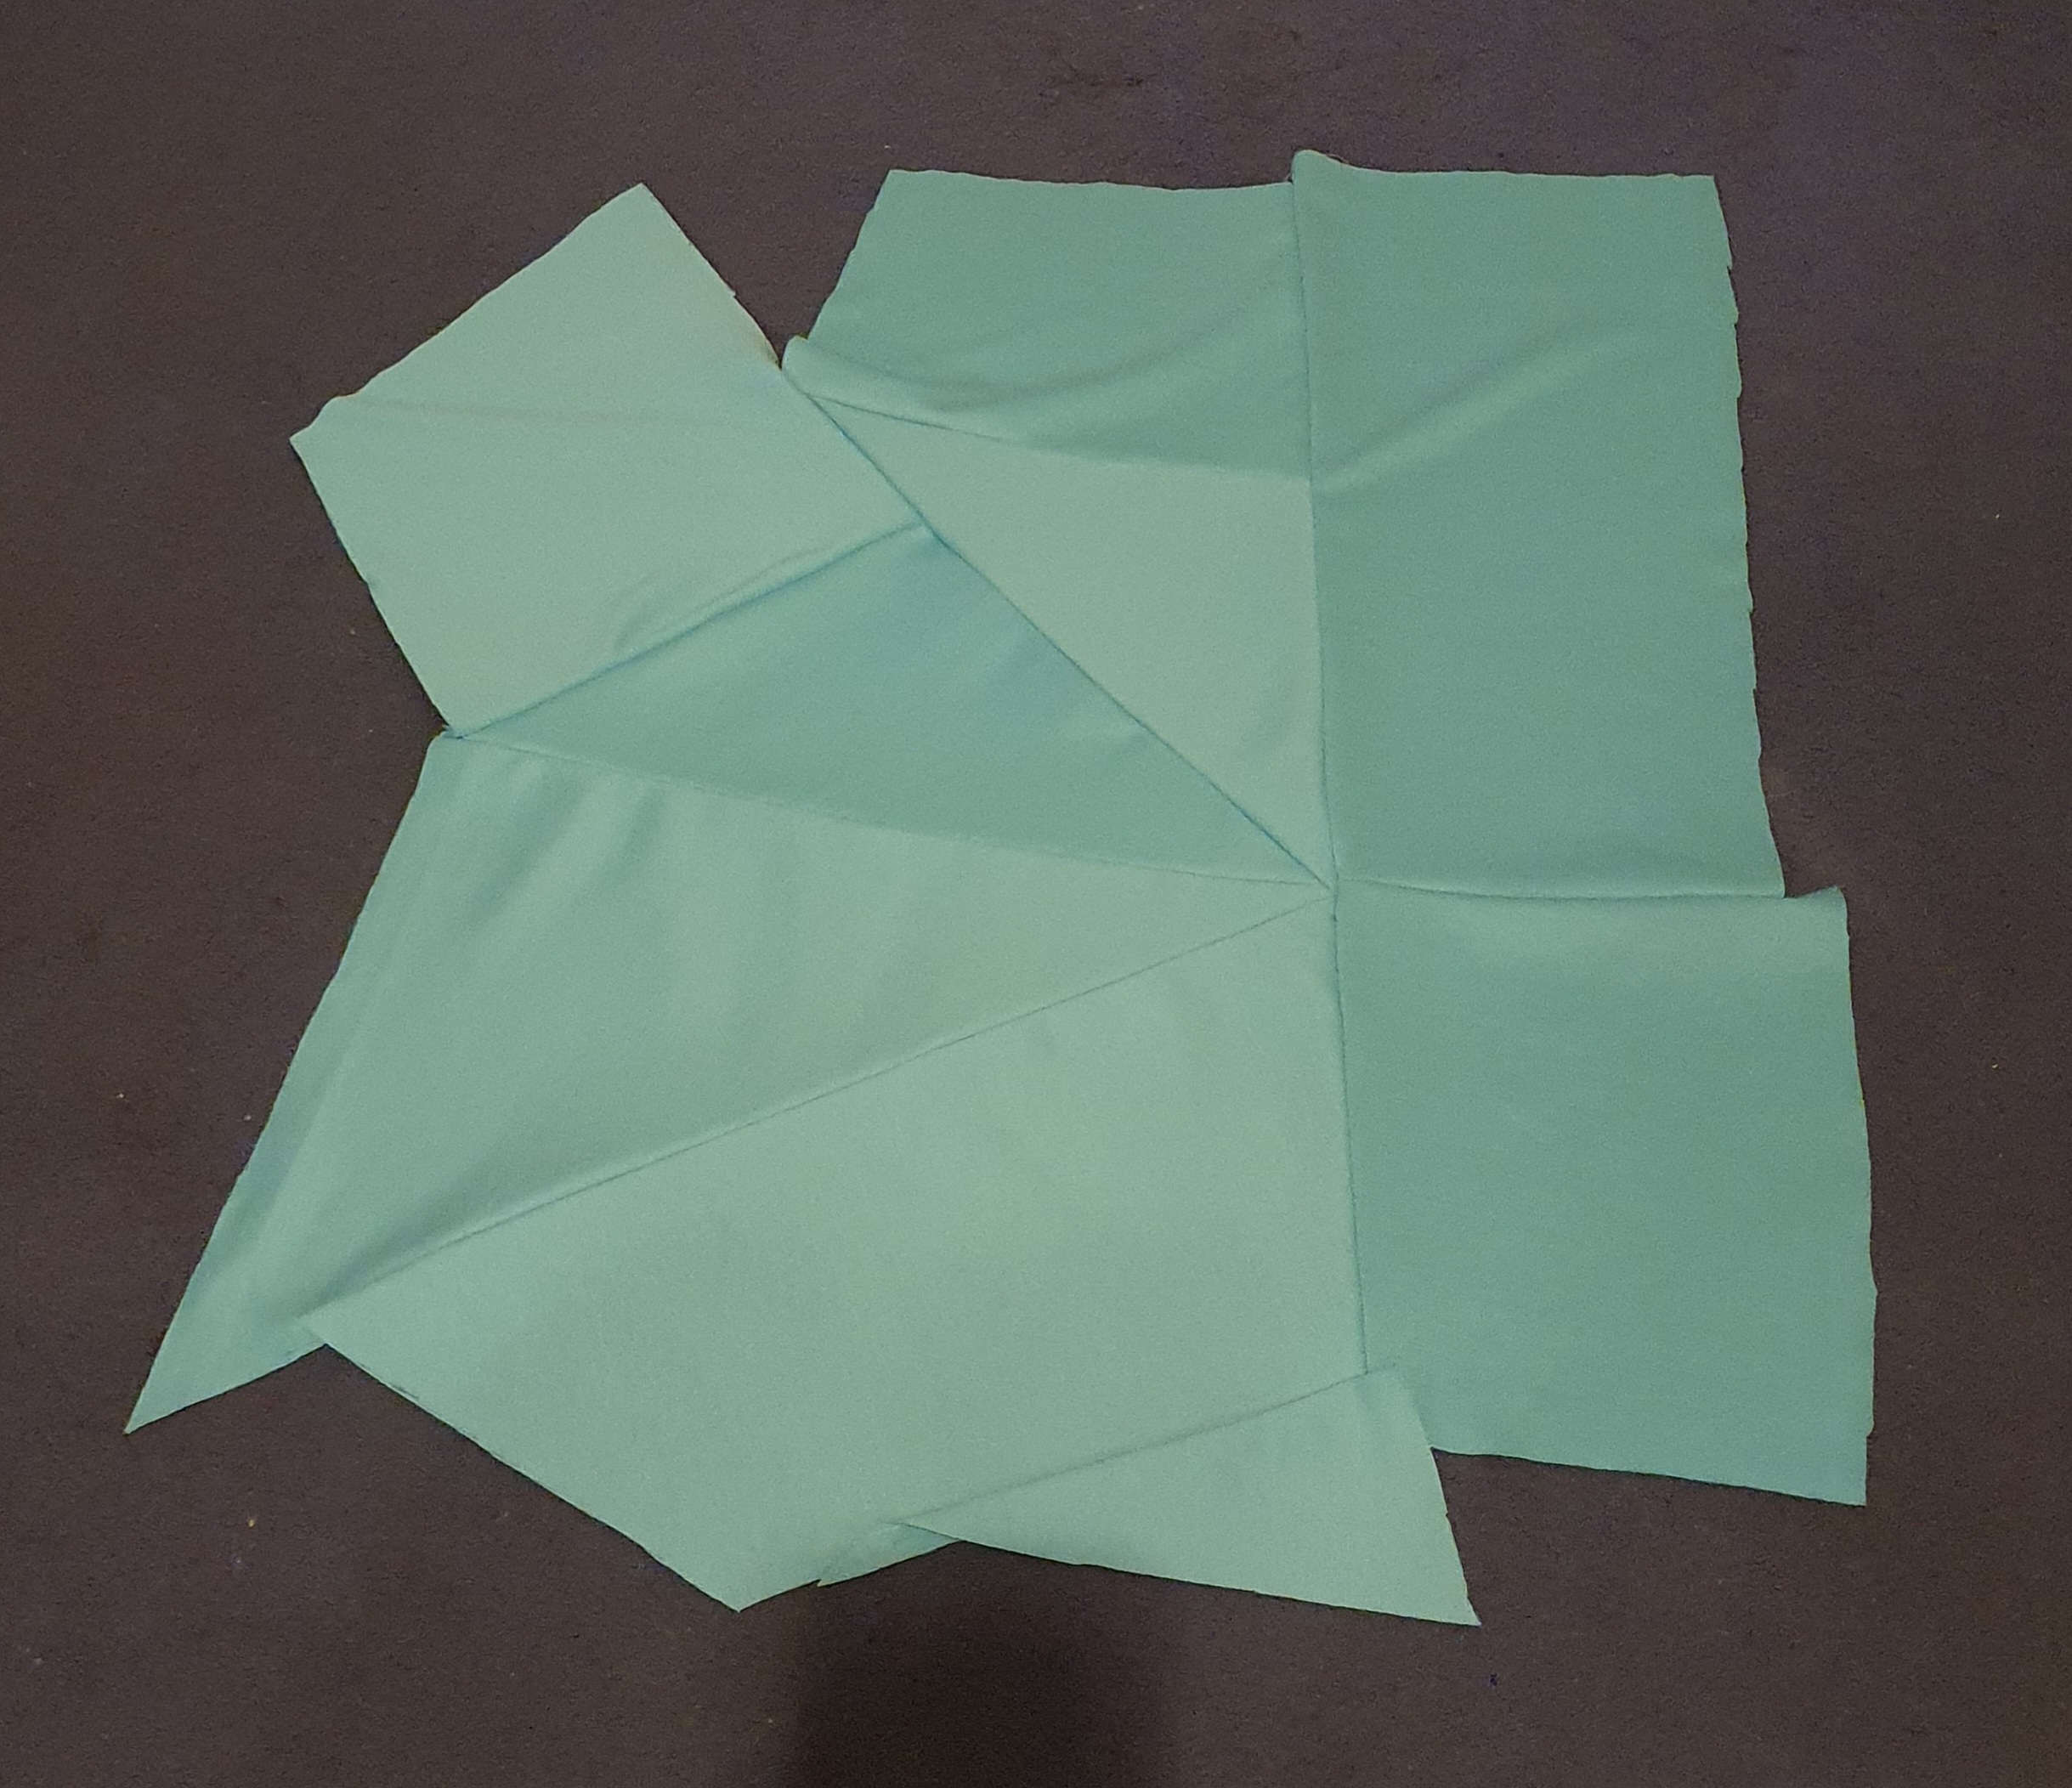
I wasn’t 100% convinced with the look I was achieving, as some of the pieces were fairly big, and I felt that if you’re visibly patching, then you’ve really got to lean into it, and make it obvious. I had two biggish sections, patched, so I cut them up a bit more and moved them around to patch them together again.

That’s more like it

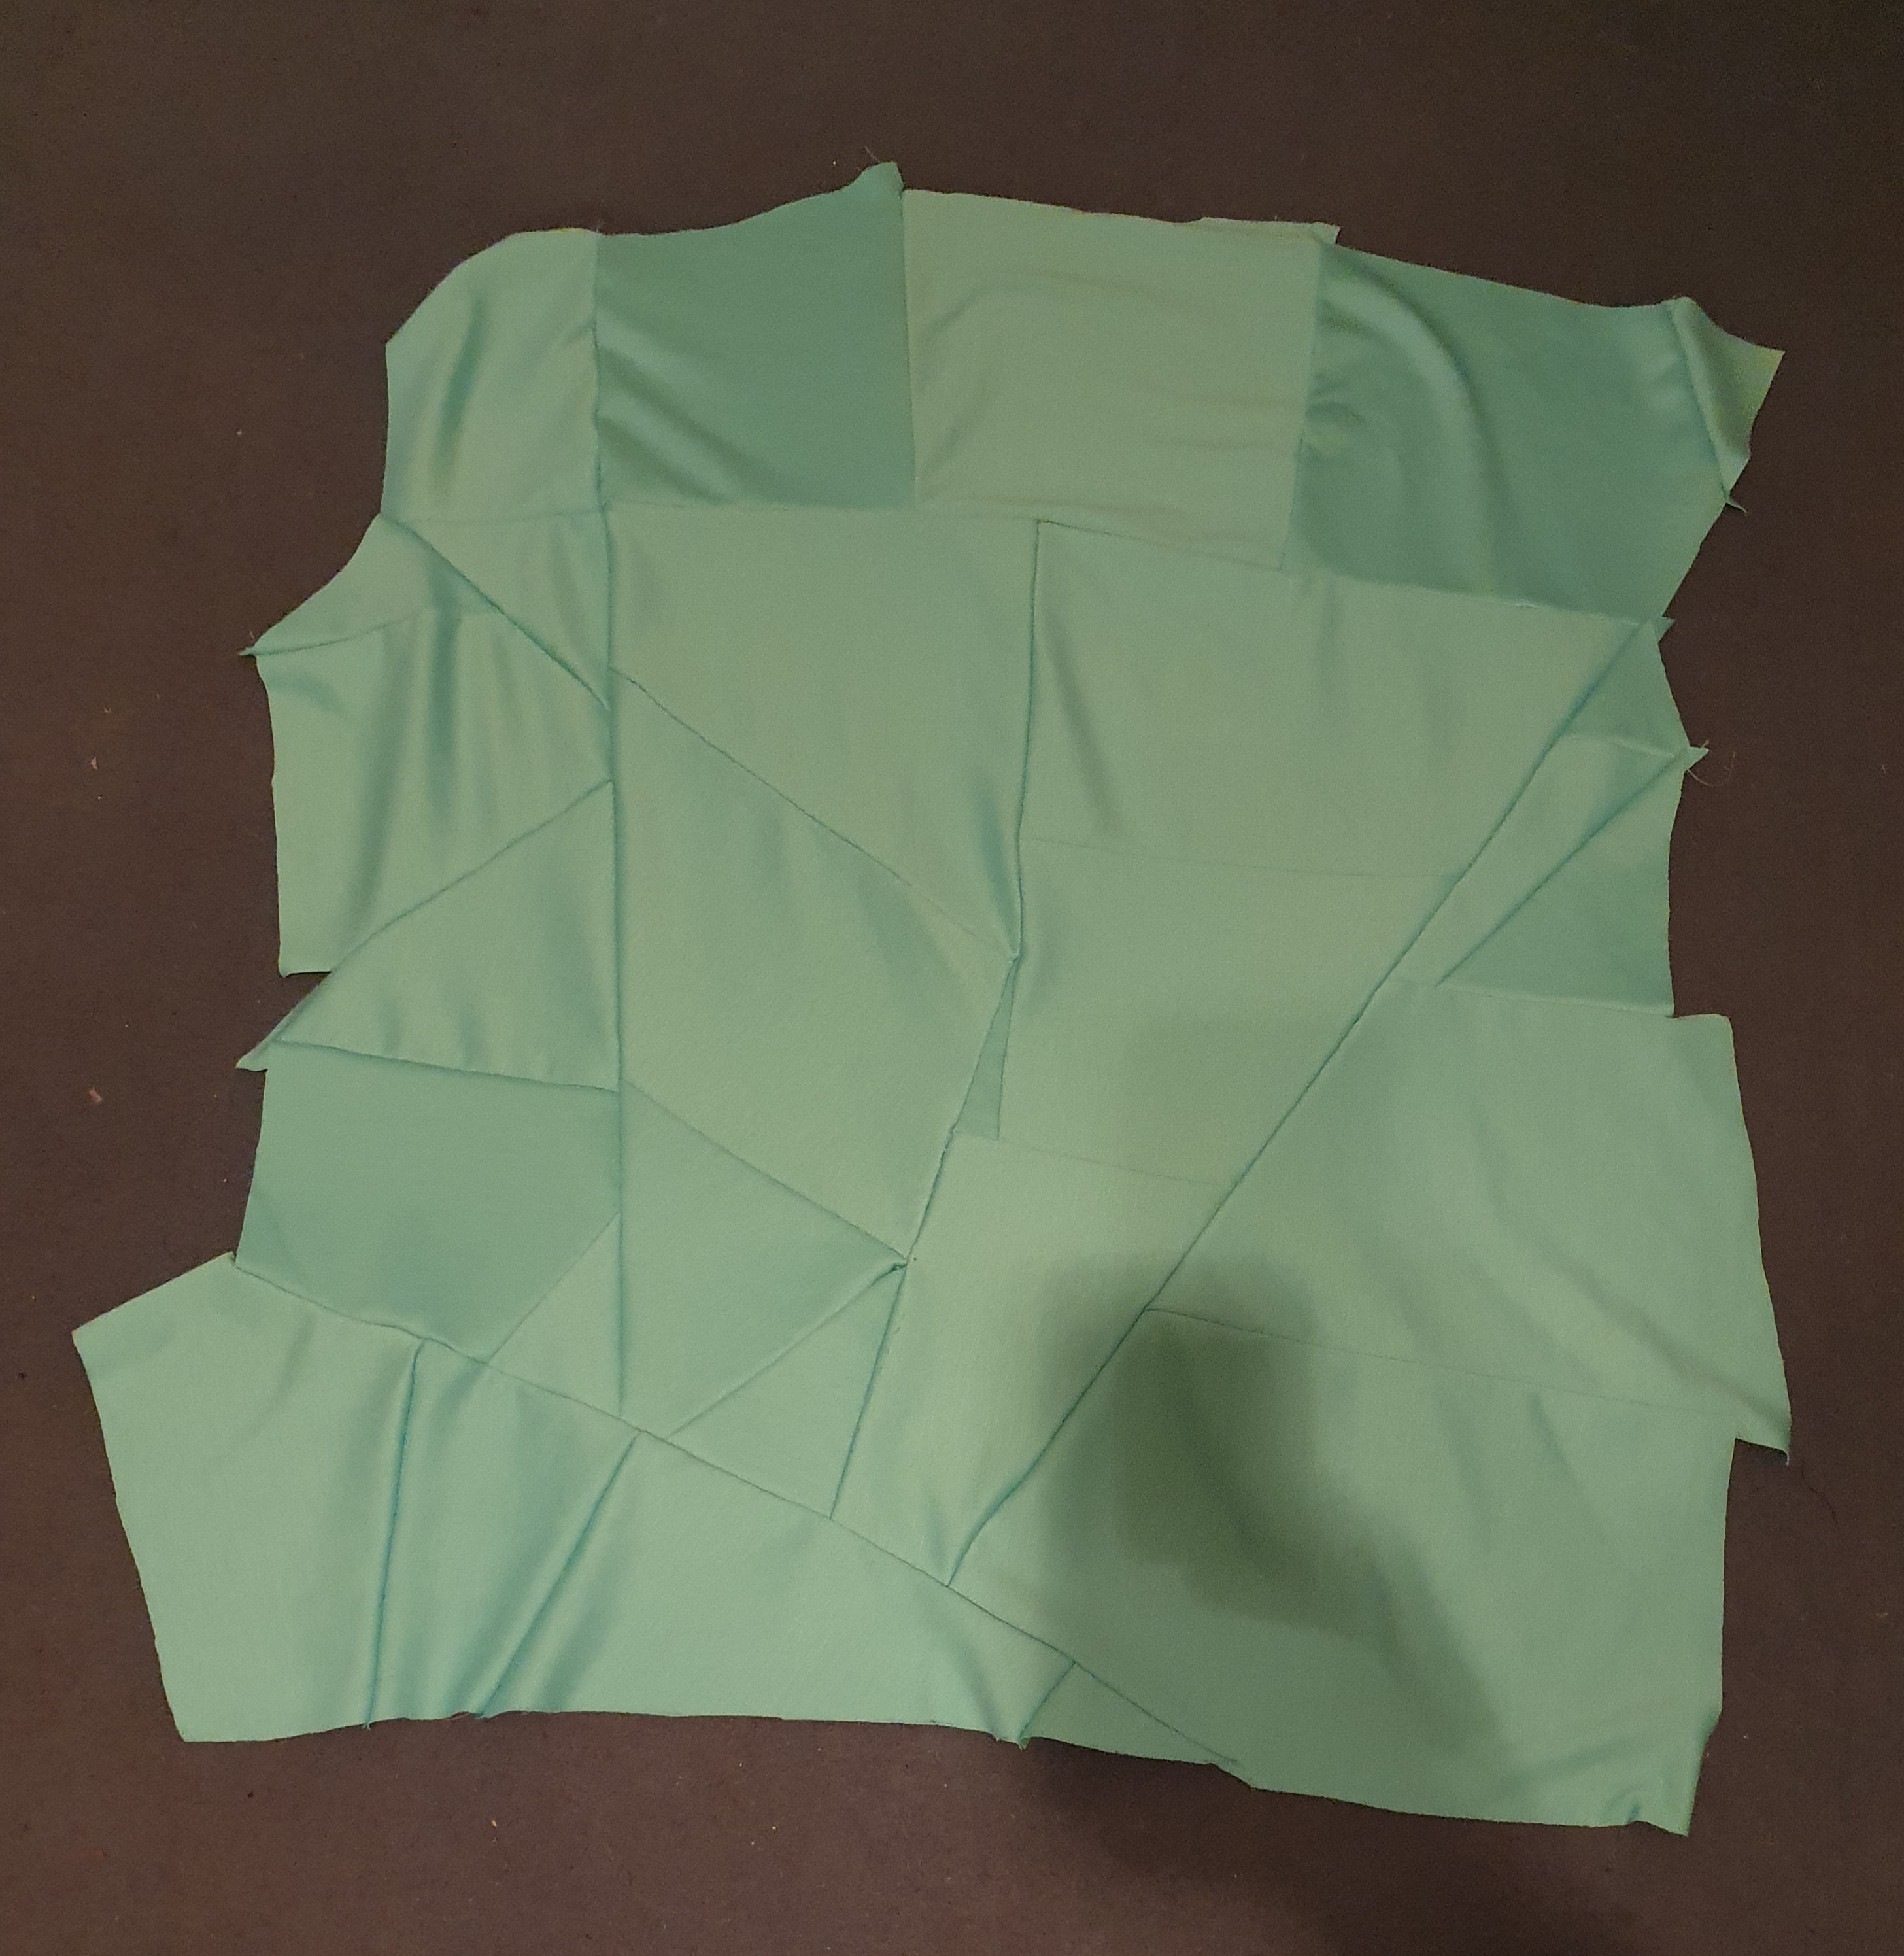
I ended up with two pieces of patching each measuring 75cm (length) by 65cm (width). That was a bit bigger than I thought I would need for a skirt front and back.

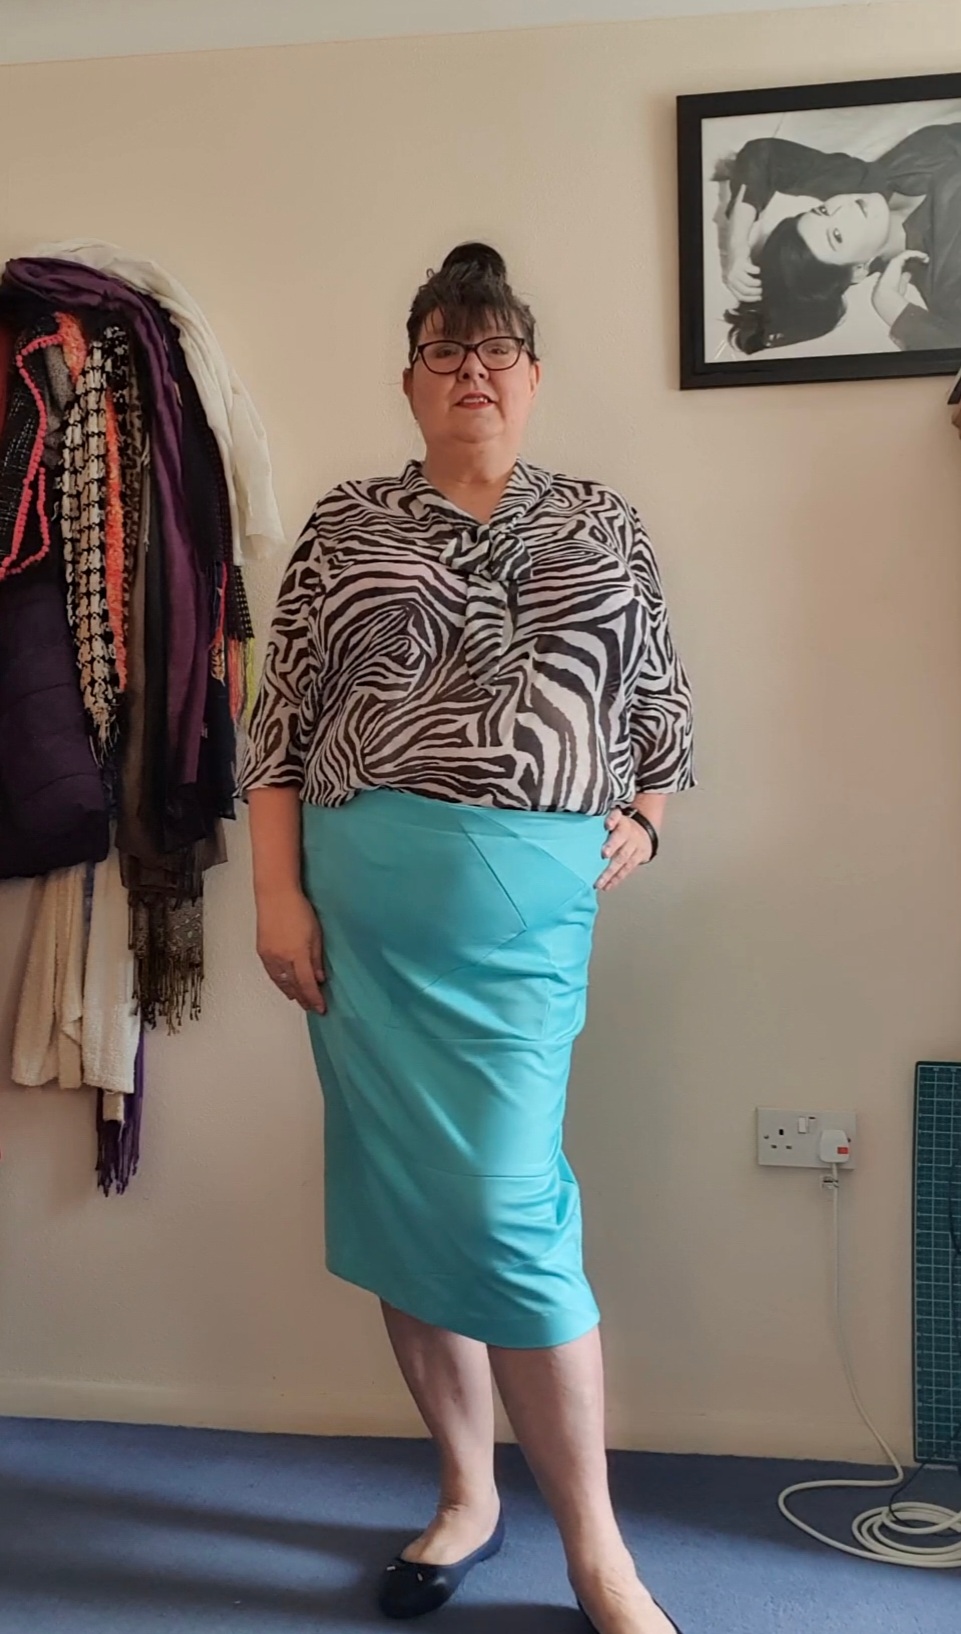
I was able to cut them, using my self-drafted stretch skirt pattern, which is basically a straight skirt shape, but pegged in a bit from the hips down. I sewed the two side seams, easy peasy. Then I attached the waistband piece to the inside of the skirt, encasing the elastic.

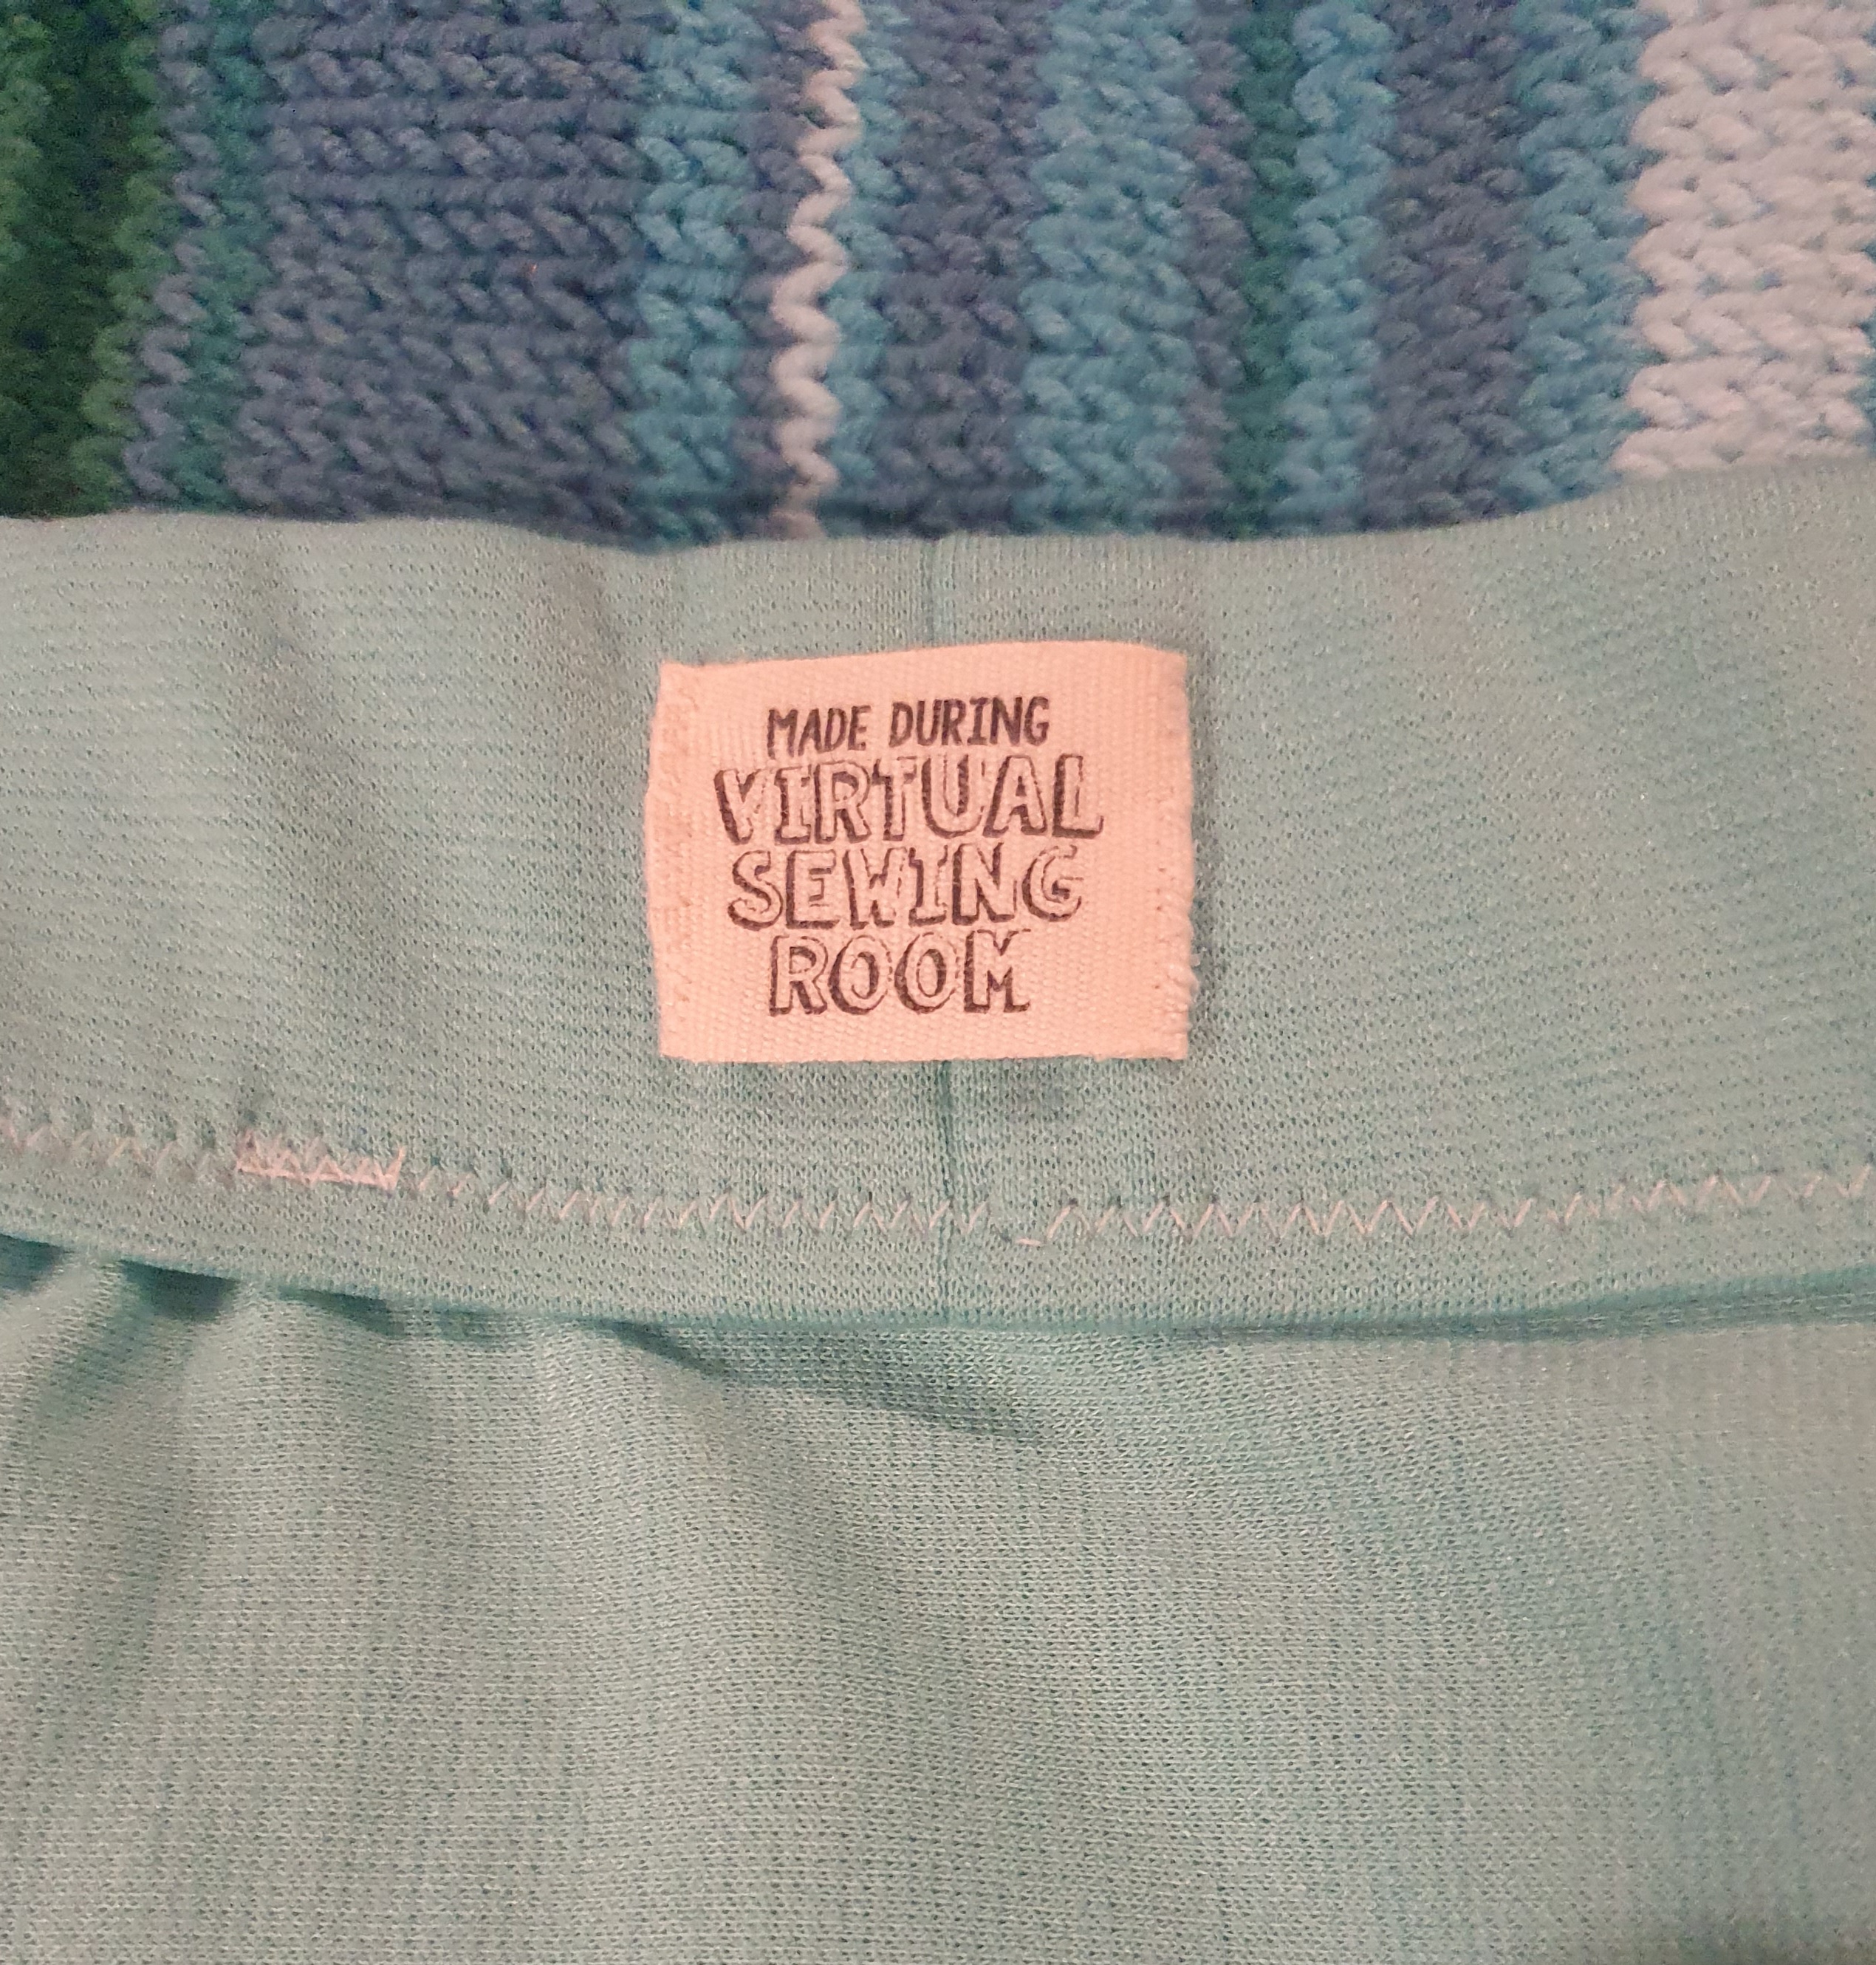
Since I have sewn this almost exclusively in the Virtual Sewing Room, I used one of my “Made in the Virtual Sewing Room” labels, to finish it off.

And here we are
The top made me feel all librarian-y!

I actually made this in January, and I was working out all the techniques for myself, with the guidance from Zoe’s instagram post. But recently she’s done a whole Check Your Thread podcast episode on this technique AND she’s created a downloadable guide on how to sew from scraps. Check it out!

I’ve been trying to be less wasteful in my sewing, and use my leftovers. That’s what this skirt was all about. I’m pleased with how it came together. I don’t know how consistently I can do this. I will keep cutting fabric as frugally as I can, so that I can either use my leftovers for another project, or Fabric Swap them. I’m not aiming for Zero Waste Perfection, but Minimal Waste Good.

Top, top, dress, skirt… Bank Holiday Makes

Over the years, I’ve bought a fair few basic Primark stretchy tees, because they’re a useful wardrobe staple. I haven’t bought any in the last 5 or 6 years, mainly because I’ve got a largely me-made wardrobe now, and I don’t feel good about buying into fast fashion. I still wear my Primark tees, but I’ve been trying to find a good pattern for a similar close-fitting stretchy tee, so that I can make my own replacements as I need to – the ones I’ve got aren’t going to live forever! It’s not been easy, all the patterns I’ve seen/downloaded needed a lot of adjustment. In the end, I realised the easiest thing was to clone one of my originals. And the weekend before last (May Day Bank Holiday weekend), I gave it a go.

I already had a half tee that I’d cut the bottom off, in order to lengthen another one. So it was an easy job to carefully cut the remaining top half (which is the bit that is hardest to draft) apart and use it to create a pattern. It wasn’t a nice clean job, because I’d worn it hard, and it was quite stretched and warped out of shape. I had to adjust accordingly, but by the end of the Sunday evening, I had a pattern that I could test out. I wasted no time, and on the Bank Holiday Monday, I used some rather nice jersey from Pound Fabrics in a dusty lilac colour and created this first version of my Repro Tee. The jersey is really good quality, nice and firm, with good recovery, so it worked well for this kind of top. I think I’ll be getting more in different colours in due course.

Apologies – all these pictures are “on the hoof” Me Made May Instagram Stories photos, just documenting what I was wearing, so I’m not wearing makeup. I will do better in future…

Snug but definitely wearable

It was more or less as I’d hoped. It was a bit on the small side, but dammit, I’m still going to wear it! Also the sleeve head was a bit tall. Those were two easy adjustments to make.

Fast forward to this weekend, the Coronation Bank Holiday weekend… I spent the Saturday morning watching the Coronation and making the next iteration of the Repro Tee, using the left over pieces of jersey from making this Trapeze dress last summer. Because it was an A-line dress, there were enough biggish bits available to make the front and back pieces, though not big enough to do any clever pattern placement. However, I did remember, this time, that this print does have a direction, and managed to make the leaves sprout upwards rather than downwards, as nature intended.

The Coronation Top

I was now happy with this pattern and started working out what fabrics I’d got in stash that I could use to make more. It’s a quick make. The thing that takes longest is inserting the neckband. Especially as I keep messing them up!

Then I turned my attention to adding a skirt panel to make this top into a dress. The Front and Back pattern pieces are both essentially the same shape once they reach my waist & hips, so I created an add-on piece to make a dress length. I tried it out with this teal jersey I bought in France five years ago. Again I was making the same version of the top, just with longer sides, so it wasn’t any trickier.

I am SO happy with this pattern

This was actually the dress that I’d had in my head right from when I’d first bought the fabric, so this is a definite win.

Finally, the skirt extension that I’d drafted has a slight taper so it’s more of a pencil skirt than a straight one. I still had a metre of the dusty lilac jersey, and rather than make a second top in the same fabric, I decided to use this to make a skirt, so that if I want to, I can wear the top and skirt as a co-ord (hark at me, being all fashionable!). The fact that this is a fairly robust jersey really makes it work for a skirt.

Navy and lilac, the perfect colour pairing!

To be honest, I’m not sure I’ll wear them together, because it’s a bit pastel pale, and I like to have some stronger colour as contrast. But the navy stripy top and skirt from the last couple of posts and the lilac top and skirt are eminently inter-swappable (yes that’s a word), so I’m feeling quite happy about that.

I’ve got so many plans for this pattern, though I don’t imagine I’ll be maintaining this level of productivity. But watch this space!

The Eyewatering Scrappy Skirt

Following on from my last couple of makes, I had some leftover scraps of the navy striped ponte, that I’d used to make my Navy Stripy Batwing Dress and my Navy Stripy Top. I’d been determined to use them to make a skirt. Here’s what I had available:

Lots of long thin bits with the stripes going across

I’d originally thought I could make a 6 panel skirt, but there weren’t enough long sections. There was just about enough to make a front and two backs, that were both a bit too narrow. The remaining bits weren’t very long, but I thought I could piece together some of the remaining scraps to make some side panels, to extend the circumference. I didn’t really have a plan. I just knew I wanted the fabric pieces in the side sections to be striping diagonally, as a contrast to the front and back horizontal pieces. I basically decided to aim for a basket weaving kind of effect for the side panels.

A plan of sorts

The combination of stripes going in all different directions did put me in mind of the Dazzle camouflage ships of the first world war! Or like trying to do those Magic Eye images… But I managed to create two strips of zigzag, basket-weaving, patchwork fabric, to place between the front and back with the plain horizontal stripes.

Apologies for any epileptic fits induced by this image

An elasticated waist and the tiniest hem I could eke out later, and I have a new skirt.

And I like it!!!
I’m pretty pleased with the stripe matching at the back
I’m beyond pleased with the eyewatering side panels
(and actually, they’re not so eyewatering in context)

I’m feeling quite proud of the size of my scraps pile. It started out as 3m, and I’ve managed to get three garments out of it. It’s not zero-waste, but I reckon it’s only about 1% or 2% waste.

I want to thank Portia Lawrie, who created and is currently hosting The Refashioners Challenge on Instagram, for giving me the boost of sewjo to get on with this project. Go check out the #TheRefashioners2023 hashtag on Instagram for some awesome inspiration.

A Swishy Skirt

I bought some houndstooth check ponte just before Christmas, on a whim, with no particular make in mind, and waited for the Inspiration Fairy to sprinkle her magic dust.

I like a bold print

The Inspiration Fairy showed up in the guise of Bianca – The Closet Historian – and this Youtube video of hers on creating a side swishy taffeta skirt.

Isn’t this look spectacular?!

I’m nowhere near as stylish as Bianca is – I dress for comfort – but I loved the idea of a side swishy skirt. I wondered if I could adapt her approach for use with this ponte. I would be working with a stretch fabric rather than a woven, and I’m not an experienced or skilled pattern drafter (more of a bodger) but I figured I could take the basics from her more sophisticated design and turn them into something more everyday. I checked I would have enough fabric (I did), and set to…

Bianca had done the pattern-drafting properly, and was doing it all in one pattern piece, whereas I was winging it, and doing it in two pieces. I was adapting a tube skirt, by adding a circle to one side of it. Like this…

It’s basically adding one massive wing to a plain skirt

It’s not an exact copy – I don’t have much waist to hip flare, so if I put my swag as high as Bianca’s is, it would be highlighting how straight my hips are, so my swag starts lower down.

I did my best to pattern match. I cut one piece first, then pinned very carefully to try and get at least a horizontal match. It seemed more important to get the match on the non-swishy side, and (maybe to a lesser extent) on the top of the swishy side. The swag was going to break the pattern completely, so I wasn’t too worried about that bit.

Not too tricky

It was a straightforward case of sewing the side seams, then making a casing in the waistband for the elastic. That elastic that I couldn’t find when I was making the Good Enough For Jazz Pants. I knew if I bought some more elastic, the original that I’d lost would come to light. And of course that’s exactly what happened.

I didn’t want the elastic to get twisty so I did a zig-zag along the centre of it, stretching it out while sewing it, to maintain the stretch. That should hold it in place.

Waistband

As this is a relatively heavy fabric, I left the skirt to hang for a couple of days, before doing any hemming. I wanted to get the worst of the wobble out. After two days, I cut the hem so the swag would end up straight, and went on to do a small hem, so as not to add any more weight to the circle section. I also realised that the heaviness of the fabric would put some strain on the point where the swag starts, so I reinforced that corner with a bit of ribbon, just to make sure it would be ok.

And voila!

New Skirt!
A little bit of swish on show
A lot of swish on show

And if you want to see the swish in action, I posted a little reel on instagram.

It seems to have a Librarian vibe. I might think about making a Pussy Bow Blouse to complete the look!

A post from the Past

If I’d been more active on here, I would have noticed before today, that this draft post from August (AUGUST!!!!) had not actually gone live.

In the interests of keeping everyone up to date with what I made, and remembering happy summer holiday days, here it is:


Well I got some of my prep done for all the holiday crafting, before I left for France. It wasn’t exactly what I had planned but I had enough to be getting on with, so it was all good!

First up, before leaving, I created a skirt and top set in the dark violet jersey I had used for the flower decoration on the chartreuse dress. I used my trusty Simple Sew Shannon pattern for a t-shirt style top. As I’ve done in the past, I skipped the neck and arm bands for a cleaner line, and to make it look less t-shirty.

For the skirt I used my self drafted straight pull-on skirt pattern, and it’s pretty much a direct copy of my royal blue one. The only difference is that this purple one was going to be hemmed by hand, rather than adding an overlocked band.

All I needed to do was get on with the hand hemming… There were a few distractions at the start of the holiday (all 3 of my sisters being there, along with nieces and nephews, and a mahoosive cousins party) but it got done eventually.

Yes, it’s another Shannon!

I also got some work done on my 100 Day Dress so now I’m on Day 75.

&

The progress report is that I’ve got about a third of the front still to embellish, and then I need to sew it all together. I’m still debating with myself what my options are for sewing together, but I reckon it’s all feasible within the 25 days I’ve got remaining. If it looks like it may need more time, then I’ll just have to be picky about using days where I’ve got nothing else to do!
For the full gen on this dress, it has its own Instagram account.

Sadly the knitting remains unknitted. But the Granny Squares blanket that I started last summer continues apace, with over 2/3 of the squares done. I even started putting them together. I learned a new technique for that, so yay for youtube:

I also visited the fabric shop in Les Sables again, and came away with a couple of jerseys, and some super-cute sunflower buttons.

I’m very happy with that little haul.

Another Simple Sew Stylish Shell Top, plus a skirt

My post has gone live on the Simple Sew Blog now, so I can share these two makes:

Way too hot for these!

The top is another iteration of the Simple Sew Stylish Shell Top, made with a beautiful minty green chambray from Doughty’s Online (supplied by them specifically for the blog – Thank you so much!). I hacked a stand-up collar onto it. Go to the blog to see how.

The skirt is another of my self drafted straight skirts, which I narrowed to pencil proportions! I used a scuba fabric from Fabricland UK, which doesn’t seem to be available on their website now. I’ve still got a load of it left, which I don’t really know what to do with, to be honest. I love the print, and I wondered if I could make a matchy matchy  jacket with what’s left. But the fabric is really hot to wear, so I’m not convinced it would be a good idea!

Both these makes were conceived before the heatwave, and I have to say, I don’t have a lot of use for either of them right now – I think they’ll be much more welcome in the autumn.

Creating a holiday wardrobe

I’m off to France for 2½ weeks next Thursday – I can’t wait! I’m trying to plan for two things, firstly I want to take a capsule-ish wardrobe, and secondly I want to take some sewing/knitting to be done there.

The holiday wardrobe doesn’t need to cover formal events, it’s going to be seaside and family visits. I’ll have access to a washing machine, so I can happily repeat wears. I’m a shocker for over-packing, so I’m trying to limit myself to 4 skirts, 5 tops and 3 dresses. I’m going for a blue based colour scheme, because this year I seem to be drawn to blues. However, in order to take the garments that I want to take, I do need to get down and make some of them. That’s ok, I’ve got a week, right? And any hand finishing can be a holiday craft project.

What I want to take

Skirts: grey birds, royal blue jersey, paisley leftovers, black denim
Tops: white dot shell top, watercolour floral shell top, mournful leopard, blue-grey t-shirt, black lace top
Dresses: Teal dress, royal blue & mint lace t-shirt dress, denim/lace jersey dress

Making stuff to take

I started last night with a royal blue jersey pull on skirt. I was using the lovely soft viscose jersey I got from FC Fabric Studio back in April.  This is another of my self-drafted numbers, mostly done on the overlocker, nothing special about it. I took trouble to make the elastic waistband nice and I used the mock-bank hem finish with my overlocker. And it’s got a lovely little “Handmade” charm inside the waistband to show me which is front & which is back.

A straightforward tube skirt

I’ll be honest, this project took considerably longer than it needed to, because the overlocker took a bit of umbrage about something, I don’t know what, and decided to break threads for no readily discernible reason. This meant proper re-threading from scratch. Which is fine, I totally know how to do that now, but it was a bit of a faff. And then it decided to break a needle. This was rather more of a learning experience. I had a spare, so no problems there, but this was a new thing to learn how to do, and for a while I got all fingers-and-thumbsy and couldn’t hold the needle *and* tighten the little screw both at the same time. But again it’s all fine, it got done, it was just time consuming. Incidentally, the broken needle pinged off quite a distance! I’m glad I wear glasses – if I didn’t I might be looking to invest in safety goggles!
I’ve got enough of this jersey left over, to make the dress I’ve got on the list.

While I was in the groove, I even got around to sewing a buttonhole and a button on the Grey Birds skirt waistband, last night, to replace the hook & bar that I first put in. This is something I’d been meaning to do for ages. So that’s another easy win. 

This means the skirts are all done! Hooray!

For the tops, I’ve got a lot to do if I’m going to take all the tops I want to take.

The Watercolour Floral top is under way. It’s nearly finished except for the hemming, which I will do by hand as a holiday project.

I’ve got a t-shirt to make, and I’m going to be using the Simple Sew Shannon Collection pattern for that. I’ve also got all the doings for a lace back top. I don’t have a pattern for this, although I think I’m going to use my shell top pattern as a starting point. I can’t use that exact technique, though, because of the lace element. It’s going to require a bit of thought and research. I’m quite excited to see how far I can take it!

And finally, the dresses… I need to make all of them! They will all be partially made, to be finished by hand while I’m away. The teal one is all ready with only sewing bias facings to be done on my hols. The other two will probably end up being self-drafted, on the fly!

I’ve also got to spend a bit of time this weekend on my next Simple Sew Blog Make, because I want it to be done before I go away. But I think I’ve got time for everything I’ve got planned, particularly as I’m leaving all the hand finishing as Holiday Sewing Projects. Which leads me to…

Holiday Sewing Projects

I know I’m lining up a fair bit of hand finishing for myself, but it will get done pretty quickly, I reckon, so I need more projects to work on. I’m going to take some knitting, but I suspect that will be the last thing I pick up, because sewing is much more my default crafting activity! Knitting is too slow.

I will take a couple of my plain t-shirts to embellish, for example there’s one that I started a while ago, that would handily fit well into my holiday capsule wardrobe, so it would make sense to take that one and get it finished.

I’ve also been researching a few haberdasheries, to do a bit of sewing sightseeing, especially for those days that aren’t so hot and sunshiny.

So that’s my plans for the next few weeks. Happy holidays! 

The unremarkable black pull-on skirt

As part of my preparations for Me Made May, I did an audit of what clothing I’ve got available to wear in May. I also did a check on my potential Separates wardrobe orphans. Nothing is an actual orphan, but it was clear that a plain black pull-on skirt was going to be a really useful addition to give me more flexibility on outfits.

I pulled out the black viscose jersey I’d bought on sale at FC Fabric Studio, and my trusty stretch skirt self-drafted pattern. The jersey was just a tiny smidge too thin to use as a skirt on its own, so I decided I would just make two skirts and sew them together at the top and effectively self line it.

No problem! I whizzed through it, nothing could have been easier. It was a nice little stash-buster make. All ready for May!

DSC_0013

Boom!

Finishing off the Massive Paisley cotton

When I cut the Bonkers Zoë Dress, I had about 60 cms left over, and I decided that would be enough for a skirt. On Monday night I reached for my self-drafted straight skirt pattern, and sewed it up. This time, there was definitely no option for pattern matching, I was just happy that there wouldn’t be any big shapes with anatomically unfortunate placement. I even had enough of the weirdly shaped scraps to cut the facing pieces.

I decided I wanted to use one of the lacy zips I’d picked up at the Knitting & Stitching Show. I’d got one in navy, and although the navy in the paisley and the navy of the zip aren’t a perfect match, I was on a “use what you’ve got” kick and went ahead. It was going to be an exposed zip, so I read/watched a few tutorials, because I haven’t done one of these, and I worked out a method that looked manageable for me and was pretty enough.

Pretty lacy zip

I knew I was going to have a train journey up to London on Wednesday, so I decided to leave all the hand finishing until then. I knew I wanted to add a bias binding for the hem, because it would allow me to make as much use of the fabric length as possible. Also I really like the feeling of a satin binding when I’m not wearing tights. I overlocked the hem, and sewed on the binding, with the tiniest turn up I could get away with, all ready for the hand sewing. So Wednesday saw me hemming the skirt on the train, and neatening up the waistband by the zip.

Hem with bias binding

And today I was wearing it to work.

A fab new summer skirt!


Lookin’ good!

I did have a moment of panic last night, as I decided to try it on before going to bed. The zip stuck and then with all my faffing about with it the teeth split apart below the puller. The thought that I might have to cut myself out of it flashed through my mind! But then I got a grip and managed to ease myself out of it, and I was able to calmly coax the teeth back into their proper order. Phew!

Zip all A-OK

What would I do differently next time? Use fabric I can pattern-match more readily!

What do I love about this skirt? It’s going to be a useful Spring/Summer skirt. I love the lace zip, and I really want to use the rest of the ones I got now.

Making a Win out of a Fail

The Fail – adding to the stash

I fell off the stash wagon at the weekend. I was supposed to not buy any new fabric until I’d used at least 6 pieces from my existing stash. But there was a sale at FC Fabric Studio on Saturday. I’d only used three pieces, though I had cut out a fourth, without having done any sewing on it. Too bad – their prices are really good anyway, but when they are reduced, they’re brilliant. I couldn’t resist.

I went with a plan… I’ve got this new overlocker, and I need to practise using it. I decided to stick to jerseys, with the idea of making some leggings and t-shirts suitable for teaching dance in, because Me-Made May 2017 is coming up and I’ll have four teaching nights where I’ll need to clothe myself. And FC Fabrics have some beautiful jerseys.

I came away with over 8 metres of viscose jersey for only £10. Three of the pieces I found in the £2 remnants box, including a deep royal blue bit that turned out to be over 2½ metres – bargain! I thought I’d be going for their printed jerseys, but maybe because there weren’t so many of them on sale, or because the plains were just calling to me, it was all plains. They all have a bit of elastane, to make them stretchy enough for my dance-practice-wear purposes.

The colours are a bit off, but not too badly

However, I was conscious of my epic failure on the not-buying-new-fabric front.  I was already in deficit to the tune of 3 makes, and the stash has gone up by 4 bits.

The Win – using up the stash and firing up the sew-jo.

This fail galvanised me into action. I had four WIPs- patterns already cut out – and I could jollywell make some of them up, to start meeting that deficit. It helps that Saturday, apart from being Fabric-Buying day was also Me-Made-May-2017-Sign-Up-Going-Live day. As I have mentioned in my post, MMM is usually extremely good for my sew-jo. That, and an overwhelming stashguilt combined to make Sunday a day of sewing.

I sewed up the navy Juliette top that I’d cut out a couple of weeks earlier. I’d cut it before the black Juliette, to test my pattern adjustments, and I’d pinned it all together to test it. I’m not sure that even constitutes a toile! But it was still pinned, so it was good to go. Having made the black one so recently, the instructions were all still fresh in my mind. I didn’t include the waist ties, because I didn’t have enough fabric, so it was even easier/quicker. The longest process was the hand-hemming. I don’t really think there’s much else I can add. I’m impatient to post this and I haven’t photographed it yet, but it’ll feature in a post soon enough, I’m sure, and it’s certain to show up in MMM!

Oh except I sewed in a little charm, into the facing, so I’d know which is back and which is front. I got a load of these at the Knitting and Stitching Show last month.

Cute, eh?

And while I had the overlocker out, and threaded up with black thread, I pulled out a long-standing UFO, to see if I couldn’t have a stab at finishing it in time to wear to work on Monday (spoiler alert – I didn’t!). This was a straight skirt, using my self-drafted pattern. I’d cut it months ago, from 80cms of cotton sateen. The fabric was a tiny smidge too narrow to fit both front and back side by side, so I had to cut it rather more snugly than the pattern dictated, and I was relying on a slight stretch in the sateen and narrow seam allowances to make it work and still be able to sit down in it. This is what I had left:

I don’t like wasting material! 

I needed to cut the facings, and as there wasn’t enough of my main fabric left, I pillaged my scraps and used a bit of purple from the You Mean I’m Wearing Orange?! skirt. I used curved petersham inside the facing, while I was understitching, to make the waist nice and crisp and stable. The technique for that is in my Pink Polka Dots skirt post. In fact I referred to it, to be sure I was doing it correctly!

I sewed all the seams on the overlocker (I love it!) and then I tested my new concealed zip foot – it’s brilliant. Using Julie’s methods have resulted in another seriously invisible zip. I’m so impressed with myself!

Well, I managed to get all the machine sewing done on the Sunday evening, but the remaining hand-sewing of the facing to the zip, and hemming got postponed to Monday evening.

Facing, with charm

But I was wearing it on Tuesday to work.

I should really be getting on with my curriculum planning…

And how invisible is that invisible zip?!

What would I do differently next time? It’s a really good fit, actually, so I’m thinking that my self-drafted pattern may need a bit of width being shaved off it. On reflection, the Pink Polka Dot skirt made last year from the same pattern is also feeling quite loose. Maybe I’ve lost some weight in the bum & tum area. Next time I use the pattern I’ll measure myself and the pattern and see if I need to tweak it.

What do I love about this skirt? This print attracted me right from the start – I love a monochrome, and the pink just makes it pop!

So that was two down from my deficit of three. I’m going to see if there are a couple more quick wins I can get under my belt this week, to try and catch up with myself. Internet accountability is a powerful motivator!